Disney Plus, released almost two years ago, now has over 129 million active users all across the globe. If you are a smart TV user, chances are your TV has the Disney+ app installed, but if not, here is how to get Disney Plus on Samsung TV.
The streaming service is relatively popular among users, and after its initial launch, it received quite a lot of positive feedback from fans across the globe. It features a collection of the famous Avengers, The Lion King, Avatar, and many others. A high-speed internet connection is always recommended to get the most out of the viewing experience.
Talking about compatibility, the Disney Plus app is compatible with different Samsung TV manufactured after 2016. Don’t worry; even if you have an old Samsung TV model, you can still enjoy Disney Plus content with the help of Roku streaming devices, Amazon Fire TV and through the casting option.
Below is a simple guide that shows you how to download the Disney Plus app on your Samsung smart TV using disneyplus.com/begin samsung tv
How to Get Disney Plus on Samsung TV?
First, open your Homescreen, aka Smart Hub, and select ‘Apps‘.
Then select the search button at the app screen’s top right corner. It looks like a magnifying glass.
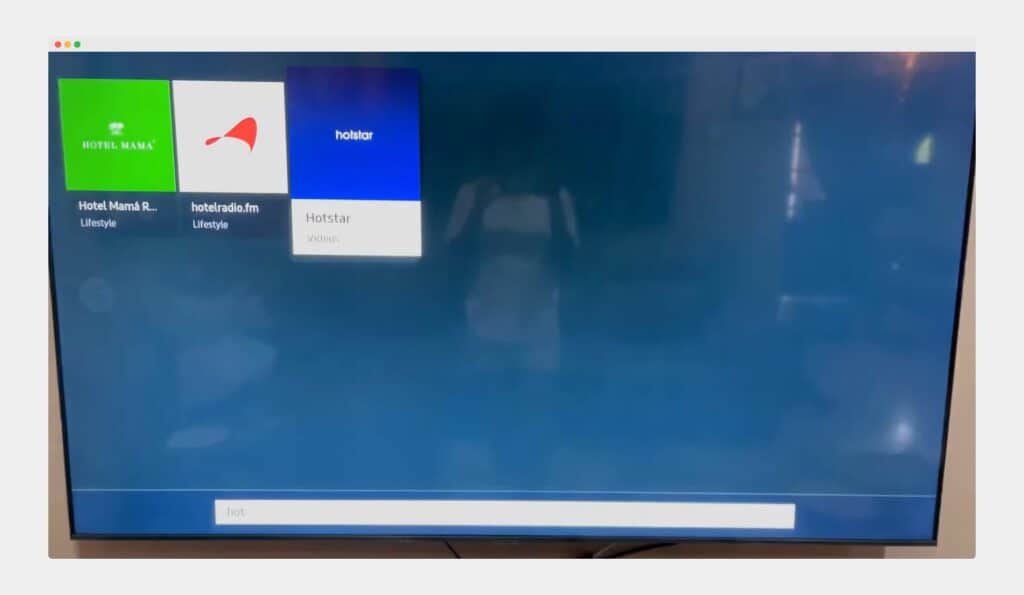
Now use the on-screen keyboard and enter ‘Disney+,‘ and select Enter.
The app will be displayed on the screen. Choose the ‘Install’ option to download app on your Samsung TV.
This is how you can install Disney+ on Samsung Smart TV, you have installed the app, but the process is not still completed. You need to log in to Disney+ to start enjoying the content on your TV. Here is how you can do it.
First, open the Disney plus app on your TV, then access the left menu and click on the ‘My Account’ option.
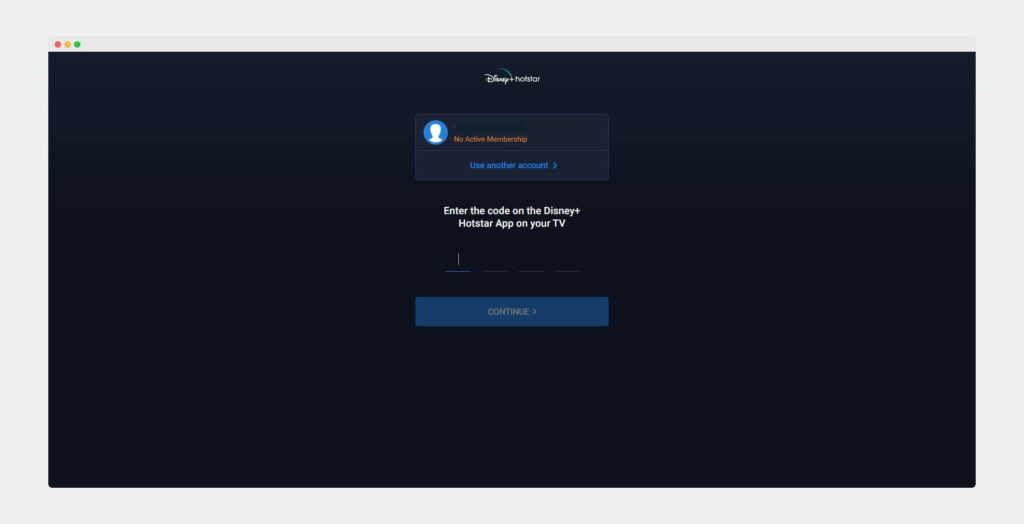
Now you will see a code on your TV screen. Take your phone and go to ‘https://www.hotstar.com/activate’ or ‘disneyplus.com/begin samsung tv’ and enter your Phone No, then enter the code display on the Samsung TV.

Follow the on-screen instructions. You also need to purchase the subscription. Once you complete the process, you will be able to enjoy Disney + on Samsung TV.
Note: If the app doesn’t appear on your screen in the fourth step, it’s a sign that the app isn’t compatible with your Samsung Smart TV model or that Disney Plus is unavailable for your region.
See also: How to Get Crunchyroll on Samsung TV?
How to Get Disney+ on an Older Samsung Smart TV?
If the Disney Plus app is incompatible with your older Samsung TV, that doesn’t mean you cannot use it with your TV altogether! You will have to spend some money on an external streaming device, and trust me. It’s worth it, rather than buying a whole new TV which may cost more.
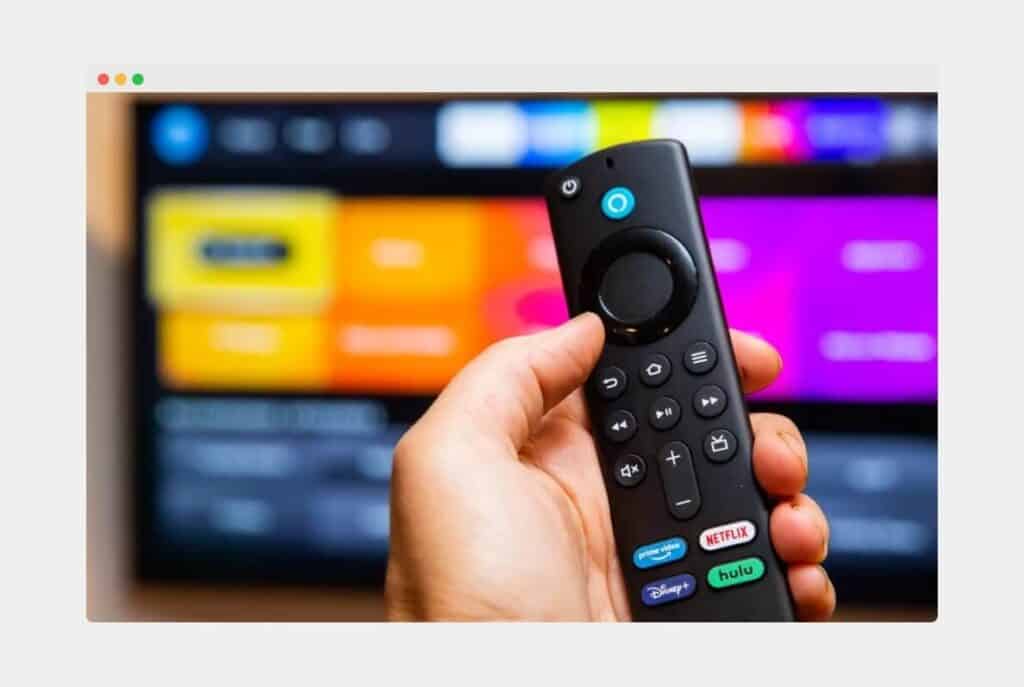
The external streaming devices we are talking about are – Roku, Amazon Fire TV, Chromecast, or Apple TV (4th gen or later). These external devices can be connected to the TV through HDMI, enabling you to access Disney Plus despite being incompatible with your TV.
If you have a PlayStation 4 or Xbox One connected to your TV, you can also use the Disney Plus app version for the respective consoles. They are available in their stores.
How to Use Disney+ on Older Samsung TV Using Amazon Fire TV?
There is a way by which you can use the Disney+ app on your older Samsung TV using disney plus/begin ingresar codigo tv samsung, which does not support Disney Plus. Amazon Fire TV Stick can help you if you already have one or are planning to get one.
Amazon Fire TV Sticks allow the older Samsung TV to use the newer functionalities of the latest Smart TV. The TV stick comes in the form of a USB device. There are some aesthetic differences present. However, you can easily connect it to your Samsung TV just like you can connect a USB pen drive.

Here is how to install and start using the Disney Plus app on your Samsung TV using the Amazon Fire TV stick:
Launch the ‘Apps’ screen from the main menu of your Fire Stick.
Search for the Disney Plus option. You might also find it under the Entertainment category in some cases.
Now, download and install the Disney+ app.
Log in or Sign in on the app to access its contents. (We have already discussed how to create a new account or log in to the app in the section above this one. You can do it with the help of disneyplus.com/begin samsung tv)
Now you can start streaming the content of your choice on your TV screen.
How to Use Disney+ on Older Samsung TV Using Chromecast?
If you have a Google Chromecast, let’s begin the process of How to use Disney+ on your Older Samsung TV using it.
Firstly, connect the power to the Chromecast by plugging it in with its appropriate cord, and then plug the HDMI cable into one of the HDMI ports of your TV, which are located at the backside.
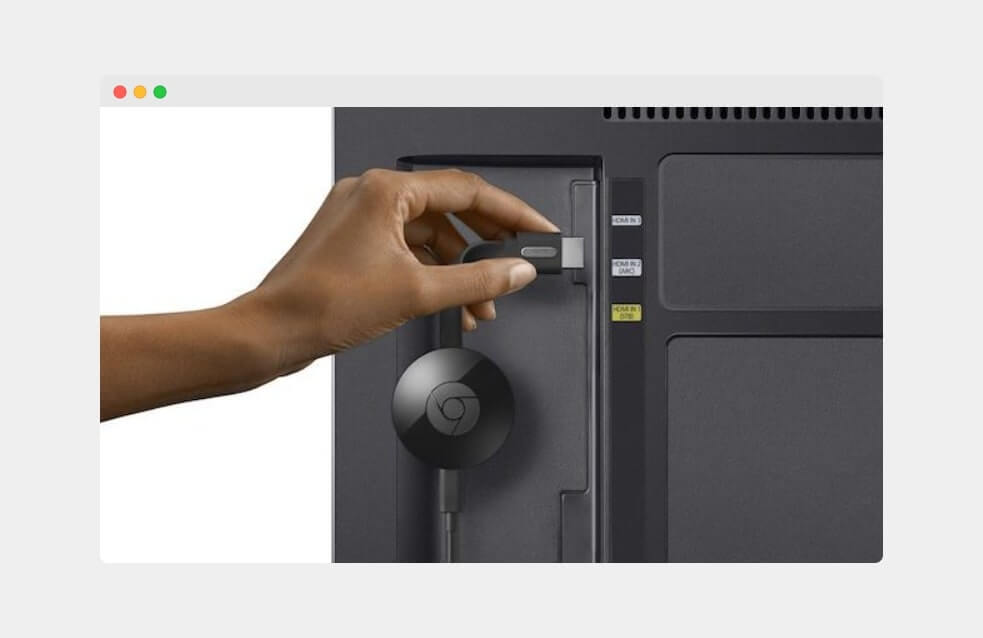
Now, go to your device’s input, and switch over the input to the Chromecast. You will be required to install the Google Home app on your smartphone and launch the app.
Look for the ‘Settings’ option, which looks like a gear, and once open, look for the ‘Add and Manage’ option and click on it as well.
A screen will open in front of you where you should select the ‘Set-up Device’ option and then the ‘Set-Up New Device’ option. Here, you will see your Home device that has been set up.
Click ‘Next’ and turn on the ‘Bluetooth’. The Google Home app will start looking for ‘Nearby Devices’, and once the search is over, you will see a list of devices on your phone’s screen. From there, select ‘Chromecast’ and click ‘Next’.
Meanwhile, on the TV screen, you will see a code and a prompt that says, “Follow the instructions in the Google Home app.” It will take a few seconds to see the same code on your smartphone. This ensures that you are connected to the right Chromecast device and not to that of your neighbors!
Select ‘Yes’ if the codes match, select ‘Yes I’m in’, and select the location of your device from the list that pops up on your screen and again click ‘Next’.
Now, a screen will pop up where you can choose your Wi-Fi network and click ‘Next‘. This is turning your smartphone into a controller temporarily.
Your Chromecast device might start updating. You will be able to track the progress on your TV screen.
Note: Your TV will restart after the update. Do not power it off.
Meanwhile, on your phone, a Linking your Chromecast page will open. Click on the ‘Continue’ button on that same page. On your smartphone’s next popup screen, enter your email if you wish to and click ‘Sign Up’ or click the ‘No Thanks’ button.
Lastly, click ‘Next‘ on the almost done page popup on your phone’s screen. Sometimes, your TV might still be updating, and you’ll have to wait for it to complete it. You’ll see a message that reads Almost Done on your TV screen.
When it does, it’ll take about 3 to 4 more minutes, and you’ll see an option to learn with a tutorial. You can click on that or choose the ‘Skip the Tutorial’ option and follow along with me.
By this time, everything is in its place and properly set up. So, launch the Disney Plus app on your phone/tablet, log in to your account on the app, and choose one of your profiles.
Choose any show or movie of your choice and click on it. You will now see options like Play, Download, and some things about the show/movie. But you will also see a ‘Cast Icon’ on the top-right corner of your phone’s screen. It resembles a rectangle with a few bars at the bottom left corner.
Click on it, and select your TV from the list. Boom!
The same show/movie will now be displayed on your TV, and once you hit the ‘Play’ button on your phone’s screen, it will also start playing the movie on your TV.
I know the initial steps are cumbersome for the setup process, but once the setup is in place, it’s child’s play to stream a movie or a TV show from the Disney+ app on your phone to your TV.
How to Use Disney+ on Older Samsung TV By Connecting Laptop Through HDMI Cable?
Follow these steps to use Disney+ on your older Samsung TV using an HDMI cable:
Open the Disney+ website on your laptop and PC and log into your account. You can create a new account by following the steps listed at the start of this guide.
Now, connect your laptop and Samsung Smart TV with an HDMI cable. Using your TV remote, choose’ Home’, then ‘Source’, and lastly, select ‘HDMI’. Now, Disney+ should appear on your TV screen.
Disney Plus Not Working on a Samsung TV? Try These Quick Solutions!
Sometimes you might face some problems with the Disney+ app on your Samsung Smart TV, and keeping that in mind, I have listed a few fixes for the same. Here is what you can do:
Restart your TV: This is the easiest solution and sometimes potent enough to solve issues with the Disney+ app that you might be facing. Follow these steps – Turn off the TV, and wait for 30 seconds. Now, plug the cord back in and power the TV on. Doing this helps to resolve the software issues that your TV might be facing. Restarting your TV every once in a while is always a good idea.
Updating your TV’s software: For the best user experience, it is always better to keep your TV updated with its latest software release. To update your TV’s software – Go to Settings, select Support, choose Software Update, and lastly, choose Update Now. If a new update is available, you will see it listed on your screen. Just ensure you do not turn your TV off while updating.
Restarting your Wi-Fi router: If you are experiencing playback-related issues, or buffering, chances are that it might be your Wi-Fi that might be at fault. Restarting your Wi-Fi router by unplugging it is best, and wait for 20-30 seconds. Plug the cord back in, and restart the router.
Re-installing the Disney Plus app: Sometimes, the simple action of uninstalling and reinstalling the apps can solve the related problems. You can do the same for the Disney+ app. It eliminates the glitches that might be present in the previous app package or data.
Deleting the ‘Cache Data’ on your TV: You can clear the cache of the individual apps. Go to Home, then select Settings, Apps, and System Apps. Select Disney Plus and then clear the cache by choosing the Clear Cache option on Samsung TV. Confirm your choice to proceed with the cache-clearing process.
How to Use Disney Plus in a Country That Doesn’t Support It?
If the Disney+ app is blocked in your region, you should consider using a Virtual Private Network (VPN).
However, a common problem that everyone faces is that Smart TVs do not have an in-built VPN feature. Hence, you might want to set up a VPN on your Smart TV using the DNS approach.
The guide below will help you access Disney Plus even from the region with its services blocked.
Activating MediaStreamer DNS Using a Virtual Private Network (VPN)
Install a Virtual Private Network (VPN) on your Windows or macOS device.
- Go to the ExpressVPN DNS Configuration page and sign in to the VPN.
- Register your IP address under the header and later on enable the automatic registration, which is further down the page.
- Now, go to the Setup page and copy your MediaStreamer IP address.
- Configure your Samsung Smart TV with the DNS addresses you just received by email.
See also: How to Get Apple TV On Samsung TV?
Explainer Video About How to Get Disney Plus on Samsung TV
How Much Does the Disney Plus App Subscription Cost?
Once you have Disney+ on your TV, you’ll have access to many movies and TV shows. Since it is a subscription-based service, you will require to pay $8 for a month, and it will reach an $80 charge for an entire year.
This guide was helpful. It was crafted specifically to be as concise as possible. If you have any questions, please leave them in the comment box below. I will reply to them with an answer as soon as possible and include it in this guide if necessary.
Happy Streaming!
